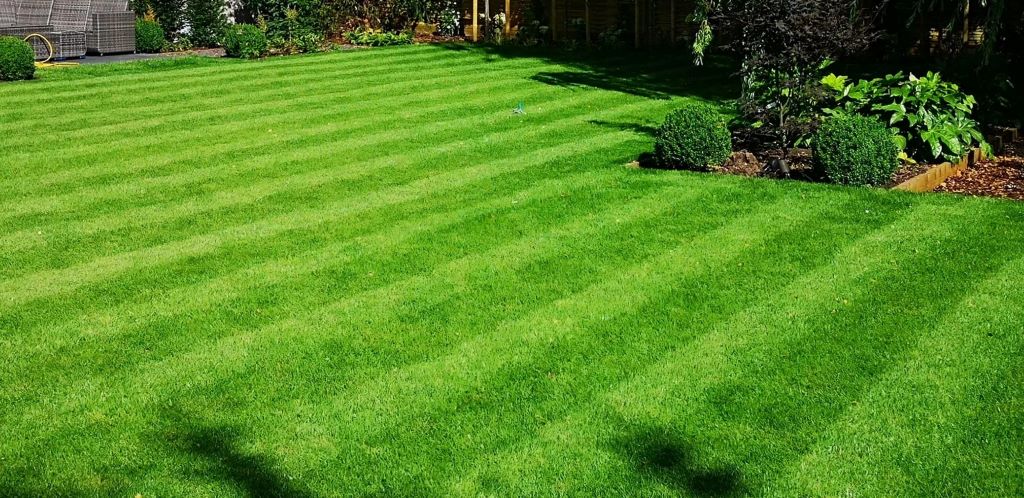


A lush, vibrant green lawn is the cornerstone of a beautiful home, a welcoming oasis for relaxation and play. But achieving that perfect carpet of green, especially during drier seasons, can feel like a constant battle with hoses and manual sprinklers. If you’re dreaming of an effortlessly verdant lawn, installing a residential sprinkler system is a game-changer. This comprehensive guide will walk you through the process, transforming your lawn care routine from a chore into a simple, automated pleasure. While it might seem like a daunting task, with careful planning and a bit of elbow grease, a DIY sprinkler system installation is well within reach for many homeowners.
Gone are the days of dragging heavy hoses across the yard or forgetting to move the sprinkler, resulting in overwatered or parched patches. An automated sprinkler system delivers precise, consistent watering, promoting deeper root growth and a healthier, more resilient lawn. Not only does this save you time and effort, but it can also lead to more efficient water usage, potentially lowering your water bills and contributing to environmental conservation. Imagine waking up to a perfectly watered lawn every morning, without lifting a finger – that’s the power of an automated sprinkler system.
Planning Your Oasis: The Blueprint to a Perfect Lawn
Before you even think about digging, meticulous planning is paramount. A well-thought-out design is the foundation of an efficient and effective sprinkler system. Rushing this stage can lead to dry spots, over-saturated areas, and ultimately, a system that doesn’t meet your lawn’s needs.
Your first step is to create a detailed sketch of your property. This isn’t just a quick doodle; you’ll need accurate measurements. Include the house footprint, driveway, walkways, patios, and any other permanent fixtures. Don’t forget to mark existing trees, flowerbeds, and vegetable gardens, as their watering needs might differ, or you might want to avoid spraying them directly. Note the different types of vegetation in various areas, as grass, shrubs, and flowerbeds have varying water requirements.
Next, it’s time to gather some crucial information about your water supply. You’ll need to determine your home’s water pressure (measured in PSI – pounds per square inch) and water flow rate (measured in GPM – gallons per minute). You can find your water pressure by attaching a pressure gauge to an outside faucet. To measure flow rate, time how long it takes to fill a bucket of a known volume (e.g., a 5-gallon bucket) from an outside spigot turned on fully, then do the math. These two figures are critical because they dictate how many sprinkler heads can operate simultaneously on a single “zone” and the types of sprinkler heads you can use. Most sprinkler system manufacturers provide charts to help you with these calculations based on your readings.
With your property sketch and water supply data in hand, you can start designing the sprinkler layout. The goal is to achieve “head-to-head” coverage. This means that the spray from one sprinkler head should reach the adjacent sprinkler heads. This overlapping pattern ensures even water distribution across the entire lawn, preventing dry spots. Consider the different types of sprinkler heads available: pop-up spray heads are suitable for smaller, regularly shaped lawn areas and shrub beds, while rotor heads, which deliver a rotating stream of water, are better for larger lawn expanses. Drip irrigation lines or micro-sprinklers are excellent choices for flowerbeds, vegetable gardens, and container plants, as they deliver water directly to the roots, minimizing water waste through evaporation.
Divide your lawn into zones based on watering needs and your water capacity. For instance, sunny areas might need more water than shady spots. Areas with different soil types (sandy vs. clay) will also have different absorption rates and watering requirements. Each zone will be controlled by a separate valve connected to the main sprinkler controller. Planning your zones effectively ensures each part of your landscape receives the optimal amount of water without over or under-watering other sections. Don’t forget to consider future landscaping plans; it’s easier to cap off a pipe now for a future garden bed than to add it later.
Finally, before you finalise your plan, check with your local municipality regarding any required permits or regulations for installing a sprinkler system. There might be rules about backflow prevention devices (essential to prevent contaminated water from siphoning back into your main water supply), depth requirements for piping, or restrictions on watering times. Getting this sorted upfront will save you potential headaches down the line.
Related: When is the Absolute Best Time to Water Your Lawn for Lush, Green Glory?
Rolling Up Your Sleeves: The Installation Process Unveiled

With a solid plan in place, it’s time for the physical installation. This is where your preparation pays off. Gather all your necessary tools and materials: a trenching shovel or a rented trencher (highly recommended for larger lawns), pipe cutters, PVC primer and cement (if using PVC pipes), polyethylene pipe and fittings (if using poly pipe), sprinkler heads, risers, valve manifold, sprinkler wire, a controller, and a backflow preventer.
-
Utility Line Location – Safety First!
Before any digging commences, this is a non-negotiable step: Call 811 (in the US) or your local utility locating service a few days in advance. They will mark the approximate location of underground utility lines (gas, electric, cable) on your property, free of charge. Digging without knowing where these lines are is incredibly dangerous and can lead to costly repairs and serious injuries.
-
Laying Out the System and Digging Trenches:
Using your design plan, mark the locations for sprinkler heads, pipes, and valve boxes with stakes and string or marking paint. This visual guide will make the trenching process much smoother. Now for the digging. Trenches for main lines (always under pressure) should typically be 10-12 inches deep, while lateral lines (only under pressure when the zone is active) can be slightly shallower, around 6-8 inches deep, or as per local codes. A rented trencher will make this job significantly faster and easier than hand-digging, especially for extensive systems. Pile the excavated soil alongside the trenches on tarps for easier backfilling later. When digging, try to make the trenches as straight as possible, with gentle curves where necessary.
-
Assembling the Valve Manifold and Connecting to Water:
The valve manifold is the heart of your zone control. Assemble the valves according to your design, usually in a valve box for easy access and protection. Next, you’ll need to tap into your home’s main water supply line. This is often the most challenging part of the installation and may require a plumber if you’re not comfortable with it. A backflow preventer must be installed at this connection point to protect your drinking water. Follow local plumbing codes meticulously for this connection.
-
Laying the Pipes:
Lay your PVC or polyethylene pipes in the trenches according to your plan. If using PVC, apply primer and then cement to each joint, twisting the pipe a quarter turn as you push it into the fitting to ensure a good seal. Work quickly as PVC cement sets fast. For polyethylene pipe, use insert fittings and clamps. It’s a good idea to flush the pipes with water before installing the sprinkler heads to remove any dirt or debris that may have entered during installation.
-
Installing Sprinkler Heads and Risers:
Attach risers (short connecting pipes) to the pipe fittings at the designated spots for your sprinkler heads. Then, screw the sprinkler heads onto the risers. Ensure the heads are flush with the ground level to prevent damage from lawnmowers and foot traffic. The top of the pop-up sprinkler should be level with the soil grade. Use swing joints or flexible risers for easier height adjustment and to protect heads from damage.
-
Wiring the Valves to the Controller:
Run waterproof sprinkler wire from each valve in the manifold back to where you will mount the sprinkler controller (typically in a garage or shed). Use multi-strand wire, with a separate common wire and one wire for each valve. Connect the wires to the appropriate terminals on the valves and then at the controller, following the manufacturer’s instructions carefully. Proper wiring is crucial for the automated operation of your system. Keep the wiring neat and protected, often running it along the main pipe trenches.
-
Installing the Sprinkler Controller:
Mount the controller according to the manufacturer’s instructions. Connect the valve wires and, if applicable, a rain sensor. A rain sensor will automatically shut off the system when it rains, conserving water. Program the controller with your desired watering schedule for each zone, considering factors like grass type, soil type, sun exposure, and local watering restrictions.
-
Testing, Backfilling, and Fine-Tuning:
Before backfilling the trenches, turn on the water supply and test each zone individually. Check for leaks at all connections and ensure each sprinkler head is spraying correctly and providing adequate coverage. Adjust nozzles as needed for direction and spray pattern. Once you’re satisfied there are no leaks and the coverage is good, carefully backfill the trenches, lightly tamping the soil as you go, but avoiding placing heavy rocks directly on the pipes. Rake the area smooth and reseed or replace sod if necessary. Observe your system for the first few weeks of operation and make any necessary adjustments to the spray patterns or watering schedule for optimal performance.
Installing a residential lawn sprinkler system is a rewarding project that adds significant value and convenience to your home. While it requires careful planning and physical effort, the benefits of a consistently beautiful and healthy lawn, coupled with more efficient water use, make it a worthwhile investment. Take your time, follow the steps diligently, and don’t hesitate to consult professionals for parts of the job you’re uncomfortable with, like the main water line connection. Soon, you’ll be enjoying the fruits (or rather, the greens) of your labor with an automated oasis right in your backyard.
Related: Eco-Friendly Lawn Care California: Safe, Green And Sustainable
People Also Ask (FAQs)
Q1: What is the average cost to install a sprinkler system yourself?
The cost of a DIY sprinkler system installation can vary widely based on the size of your lawn, the quality of components chosen, and whether you need to rent equipment like a trencher. Generally, you can expect to spend anywhere from $500 to $2,000+ for the materials. Professional installation will typically cost significantly more, often ranging from $2,500 to $5,000 or higher, depending on complexity and location.
Q2: How deep do you bury sprinkler lines?
Main sprinkler lines, which are always under pressure, should typically be buried 10-12 inches deep. Lateral lines, which are only pressurized when a zone is active, can often be buried a bit shallower, around 6-8 inches deep. However, it’s crucial to check your local building codes, as depth requirements can vary by region, especially in areas prone to freezing. Deeper installation helps protect pipes from frost damage and accidental damage from aeration or digging.
Q3: What is the best type of sprinkler head for a home lawn?
The “best” type depends on the specific area of your lawn: * Pop-up Spray Heads: Ideal for smaller, regularly shaped lawn areas (e.g., under 30 feet in width) and intricate landscapes or flowerbeds. They deliver a fixed fan-shaped spray. * Rotor Heads (Rotary Nozzles): Better suited for medium to large lawn areas (typically over 30 feet). They distribute water in a rotating stream, allowing for longer spray distances and more uniform coverage over larger expanses. * Drip Irrigation/Micro-Sprinklers: Excellent for garden beds, shrubs, trees, and container plants, as they deliver water slowly and directly to the root zone, minimizing water waste.
Q4: Do I need a permit to install a sprinkler system?
In many municipalities, yes, you will need a permit to install a residential lawn sprinkler system. Permit requirements often involve ensuring the system includes a backflow prevention device (to protect the public water supply) and may dictate pipe depth and inspection schedules. Always check with your local city or county planning/building department before starting your project to understand the specific requirements and obtain any necessary permits.
Q5: How long does it take to install a sprinkler system yourself?
For an average-sized residential lawn, a DIY sprinkler installation can take a dedicated DIYer anywhere from 2 to 4 full weekends. The time will depend on your skill level, the complexity of the system, the size of your yard, the type of soil (clay is harder to dig than loam), and whether you’re using a trencher or digging by hand. Planning and preparation time should also be factored in.
Q6: What are common mistakes to avoid when installing a sprinkler system?
* Inadequate Planning: Not creating a detailed sketch, miscalculating water pressure/flow, or poor zone design. * Not Calling 811: Failing to locate underground utility lines before digging. * Improper Pipe Depth: Burying pipes too shallow, making them susceptible to damage. * Poor Head-to-Head Coverage: Resulting in dry spots or uneven watering. * Skipping a Backflow Preventer: A critical safety component that is often legally required. * Incorrectly Sized System: Designing a system that your water supply cannot adequately support. * Not Flushing Pipes Before Installing Heads: Debris can clog nozzles. * Ignoring Local Codes and Permits: Leading to potential fines or system rework.
Q7: How often should I water my lawn with a new sprinkler system? The ideal watering frequency depends on grass type, soil type, sun exposure, and recent weather. Generally, it’s better to water deeply and less frequently to encourage deep root growth. For new systems and established lawns, aim for 1 to 1.5 inches of water per week, spread over 2-3 sessions. Use catch cans placed around your lawn to measure how much water your system delivers in a set time. Adjust your controller’s run times for each zone accordingly. Observe your lawn and adjust as needed – wilting or a bluish-gray tint can indicate it needs water.
Conclusion: Reap the Rewards of Automated Lawn Care
Investing your time and effort into installing a residential lawn sprinkler system is a decision that pays dividends in convenience, lawn health, and potentially, water conservation. While the initial undertaking involves careful planning and physical labor, the long-term benefits of an automated, efficient watering solution are undeniable. By following a structured approach – from meticulous design and adherence to safety protocols, to careful installation of components and thorough testing – you can transform your lawn care routine from a demanding chore to a set-and-forget operation.
Remember, a successful DIY installation hinges on understanding your property’s specific needs, respecting local regulations, and not shying away from seeking professional help for tasks like connecting to the main water line if you feel out of your depth. Once your system is up and running, you’ll be greeted each day by a healthier, more vibrant landscape, all while freeing up your valuable time to simply enjoy your beautiful outdoor space. So, embrace the project, and get ready to enjoy the ease and effectiveness of automated irrigation, ensuring your lawn remains a lush, green haven for years to come.